This is the blog. Click here to go to the Zenopus Archives website.

Note: Many older posts on this blog are missing images, but can be viewed at the corresponding page in the Internet Archive

FEATURED POST

The Forgotten Smugglers' Cave: Index of Posts

An index of posts describing the Forgotten Smugglers' Cave, an adventure for Holmes Basic characters levels 2-4.                    ...

Showing posts with label Kids. Show all posts

Sunday, May 17, 2015

Beyond the Door to Monster Mountain


Screenshot of Beyond the Door to Monster Mountain


Click here to download Beyond the Door to Monster Mountain

Here's something I finally had a chance to finish up. I turned the Monster Mountain micro-dungeon I posted here last year into a one-page pdf. It's written up for Holmes Basic, using the stat block from the original B2 Keep on the Borderlands - DX stat included. However, you should be able to use with any old D&D without changing anything.

It's modified a bit from the original write-up. I added one of my favorite monsters - stirges - to room 3 to explain the gem stuck in the crack in the floor. In Holmes Basic, stirges are treasure type Q, which is Gems or Jewelry only. I interpret this as a fondness for gems.

It's intended as an introductory adventure for new players, especially kids. The dungeon is a simple puzzle, and relies on text adventure type solutions - most rooms have an obstacle that can be overcome using an item found in a different room, although this being D&D other solutions are certainly possible, as determined by the DM.

The dungeon was built out of Lego Heroica, the sadly discontinued Lego game series from a few years back. If you have a few Lego Heroica sets you could recreate the dungeon build yourself. Otherwise it should be simple to recreate with dungeon tiles or for player(s) to map.

I ran this dungeon for a child running a single 4th level fighter, but it should work for four 1st level characters. So I'd call it an introductory adventure for 3-5 character levels. 

I've also added it to the resources on the Holmes Ref page.

Friday, January 31, 2014

Micro-Dungeon: Monster Mountain #1


Above is a micro-dungeon I created on the fly tonight using Lego Heroica pieces for minis and dungeon tiles. It was successfully explored by a fighter of 4th level using the Holmes Basic rules, although it should work for any old D&D rules.

Monster Mountain #1

The Town is built against the base of a forbidding mountain. At the back of town, against the side of the mountain, is an old metal door shunned by the villagers. Rumors say that beyond the door lies the 'Rat Room', but further in the corridors are never quite the same...

1. Rat Room. The metal door is stuck and must be forced open. Light from the outside will dimly light the room. The floor is covered with garbage such as rotten timbers, rusty pieces of metal and musty fabrics. There are all sorts of small openings the walls. There is always one Giant Rat here when the room is entered from outside the dungeon, and it will immediately attack. If the garbage is searched for 3 turns there is a 50% chance of findingup 1d6 gp but another rat will always appear at the end of that time. When re-entered from inside the dungeon there is a 50% chance of 1d2 rats being here. The corridors exiting the room are completely dark.

2. Water Pit. The corridor is interrupted by an open pit filled to within 1' of the edge with water, 10' feet across and 20' feet deep. The water can be safely traversed with the 15' ladder from Room #7.

3. Gem Room. This room is empty except for a large 500 gp yellow topaz wedged in a crack in the floor in the northwest corner. It can be kept, sold or fed to the frog statue in room 6 to get the key to Room #4.

4. Helmet Room. The entrance to this room is blocked by a locked metal gate. In the room is an invisible Helmet of Health, which allows the wearer to heal 1d8 hit points, once per day. If the room is unlocked with the key from the frog in room 6, the helmet will immediately become visible.

5. Abandoned Archway. Steps lead up through an elaborate archway and back down into this room. On the wall above the archway inside the room lurks a Large Spider (9 hp). It will pounce on anyone entering the room. It is an ambulatory dungeon predator so it makes no webs and keeps no treasure.

6. Frog Statue. The tunnel ends at a 3' high arch. A faint glow can be seen beyond the arch. To enter a character must crawl on hands and knees. At the end of the room is a phosphorescent 2' tall stone frog statue. If approached it will ask the character what it wants. If asked for treasure, the frog promises to reveal 'a magic treasure' if fed a gemstone (minimum 500 gp value). If given such a gem the frog will open its mouth and spit out a metal key that opens the gate to Room #4.

7. Goblin Ambush. The 10' high door of this room is resting lightly in the frame, unattached. It has been rigged to fall on a character that tries to open it. It can be avoided with a successful Dex check (3d6, roll under); otherwise 1d6 damage is taken. Inside the room are two Goblin Guards (hp 6, 2; fight as hobgoblins) armed with spears, one standing to each side of the door. They will be alerted by the falling door and simultaneously attack if the room is entered. If one is killed, the other will attempt to flee if it fails a morale check (2-6 on 2d6; check again each round). They have a sack of gold (100 gp). A rusted but sturdy 15' metal ladder lies discarded on the floor at the south end of the room. It can be used to successfully cross the water pit at Location #2.

Wandering Monster:
Dungeon Dog (HD 1, hp 2 out of 7 when encountered, AC 7, DX 15, AT 1, DMG 1d4). This poor fellow is in bad shape, barely surviving in the dungeon. He hunts giant rats but they often wound him. If he smells a character carrying food he will try to knock them down and get their pack. If given rations he will stop attacking, grab the food and slink off to eat it. If given a second feeding (one day's worth), he will begin following the character. If treated well he may become a loyal companion.

Notes: 

-Rooms, monsters and treasures were chosen/built and placed on the board as they were encountered. It was fun so I wrote up the key afterward.

-The Lego Heroica game pieces ('microfigs') are smaller scale than regular minifigs, so they lend themselves well to quick, compact builds. Regular scale Lego animals (rats, frogs, spiders etc) make suitable giant animals at this scale.

-The Rat Room is, naturally, inspired by Rooms G, N and RT in Holmes' Sample Dungeon. From a design standpoint it's at the beginning of the dungeon to reduce running back and resting between encounters.

Update: I changed the title of this post to "Micro-Dungeon" since that is the 'scale' of Legos that were used.

Update 2: This dungeon is now available as a downloadable one-page dungeon.

Friday, September 20, 2013

TSR Ads in Boy's Life 1977-1982


TSR ad in the March 1977 issue of Boy's Life


This post chronicles TSR's advertising in Boy's Life, the monthly Boy Scout magazine, in the late '70s and early '80s. It had a wide circulation because a subscription was included as part of annual Boy Scout dues. I was an avid reader after joining the Scouts in the early '80s. The website for the magazine contains a neat searchable archive ("Wayback Machine") of back issues. It appears to be powered by Google Books, and the same issues can be searched there. Using these tools, here's what I found:

The earliest ad (shown above) that I found is from March 1977, a few months prior to Holmes Basic. It's small and buried in the classifieds on page 65, has TSR's early Lizard Logo, and doesn't even mention D&D by name.

The December 1978 issue briefly mentions D&D in an article about new games and toys, as "a fantasy game where player battles his way through a monster-filled castle" (pg 36).

The next ad doesn't appear until September 1979, more than two years later. This is a full-page ad titled "Not Just A Game" for the 2nd edition of the Holmes Basic Set. The format is similar to others from the same time period, each with the same photo but a different line at the top of the page. TSR has switched to the Wizard Logo by this point.


The November issue has another version, "Be a Hero!":


This same issue also has "War Games" by Jon C. Halter, an article including a section on Roleplaying that briefly describes D&D and Runequest. TSR's boardgames Dungeon! and Snit's Revenge are also mentioned elsewhere.

April 1980 brings an ad with new photography titled "Enter the Gateway to Adventure". The title ties in with the Gateway to Adventure catalogs that are sometimes found with Basic Sets. The module B1 is still shown but now we've got chits instead of the the rainbow dice. Elsewhere I've also seen a later version of this ad that is in color and has module B2 instead of B1. See here.


In May 1980, TSR switches to advertising a different RPG, Gamma World. The awesome Trampier art in the middle comes from the rulebook - I always dig his silhouettes. This ad mentions the vaporware "Metamorphosis Alpha to Omega" - a planned revision of the original Metamorphosis Alpha RPG to tie in with 1st edition GW.


The next month TSR switches to a boardgame, The Awful Green Things From Outer Space. I'm not sure that I've seen this ad before. Color appears here for the first time in a TSR ad in Boy's Life. A neat detail: the TSR wizard is standing on a planetoid at the bottom of the page. This same ad runs again in October.


In November, a full color TSR ad appears for the first time, "Who Needs to Hang Around?". The Holmes Basic set is still being advertised despite the imminent arrival of B/X. The kid in overalls is holding the Basic rulebook, and the ones in the background are running the module B2 Keep on the Borderlands.


Strangely, this ad runs in a less colorful version the next month, perhaps to save money? It's also changed, with the kids posed differently. This ad runs again in January 1981.


The December issue also has Pedro suggesting the Basic Set with B2 as a holiday gift. The photo is the same one shown in the ad linked to above.


February 1981 advertises the new revision of the Dungeon! boardgame. TSR's new Face Logo replaces the Wizard Logo. This ad runs again in March, April, May, July and October


The run of Dungeon! ads is interrupted briefly in June when an ad for the new Escape from New York boardgame appears:


In August an ad for Dungeons & Dragons finally reappears. It's the first one touting the new Basic Set, although it's hard to tell because it's just a small detail in the comic. This comic is the first in a series of four, one of several series that ran in other publications such as comic books around this time, but this is the only one that ran in Boy's Life.


Strangely, in September we see a brief reappearance of the Who Needs to Hang Around kid (version 2) with the Holmes Basic Set, despite the new Moldvay Basic Set being released 9 months earlier. This ad differs a little in having the TSR Face logo. This may be the only magazine ad I've seen for Holmes Basic with the Face logo.


In November and December, the ad for Dungeon! reappears in glorious full color for the holiday season:


The December issue also features Dungeon! as one of the recommended gift items:


January 1982 sees a new ad for Dungeon! featuring the irksome Morley the Wizard. And the family has been replaced. Or they just older? This ad runs again in March and April.


In February, TSR's first wave of minigames appears:


Later that year, in August, there's an ad for the second minigame series. IIRC these didn't sell very well so TSR didn't produce any more.


Finally, in May 1982, there's the first full color ad for the new Basic and Expert sets (B/X). I like the artwork but have no idea who the artist is. The kids also featured in a TV commercial from this time and include the actors Jamie Gertz & Alan Ruck. This ad runs again in June and July, but also turns out to be the last D&D ad in Boy's LIfe.


In September and October, TSR instead advertises the Star Frontiers RPG:


A different Star Frontiers ad from November:


And in a big change from the previous two years, there's no TSR ad at all in December, though I did spot one for Traveller from GDW:


And then the TSR ads disappear for the entirety of 1983. One finally reappears in mid-1984 for the Endless Quest books with a newer TSR logo. There are a few Indiana Jones RPG ads around Xmas in 1984. A Buck Rogers ad in 1988. But no more advertisements for D&D after mid-1982. I wonder if this was a marketing decision by TSR, or if there was a policy change at Boy's Life due to the backlash against D&D in the '80s?


Monday, April 23, 2012

Storytelling with B2, part II


After telling the Castellan about the adventure with the lizardmen and the spiders (Part I), the Warrior asked if he could become a knight. The Castellan replied it would only be possible to become a Knight of the Realm through extraordinary service to the Keep.

Suddenly the Guild Master burst in with urgent news: two out-of-town guests at the Guild House had vanished during the night, and while looking for them the guards had discovered a secret door in the basement where none was previously known. Shortly after it was opened two skeletons had emerged and battled the guards. The guards refused to explore further, and so the Guild Master had come to the Castellan for assistance. The Castellan asked the Warrior if he would investigate, and he agreed. Accompanying the Warrior would be his trusty Dwarf companion, the Castellan's Advisor (an elf), and the Curate of the Chapel. We then looked at the picture of elves and dwarves in the Player's Handbook:


The group arrived at the Guild House and I showed him the map in the back of B2, with the stairs leading to the basement. The Guild Master took them through the  the basement kitchen to a small storeroom in the back, and showed them the trap door in the floor. It appeared that a seal on the door had been recently pried open, making it noticeable. The Warrior opened the door and saw a set of stone stairs leading down into the dark. He lit his lantern, and then gave it to the Dwarf so he could descend with sword out and new magic shield in hand.


At the bottom of the stairs he spotted two bodies lying on the floor of a dusty room. Two more skeletons then came through a doorway and attacked! The Warrior chopped off the arms of one as it lunged for him, and then broke the rest of it apart, while the Dwarf took care of the other one. The bones crumbled away to dust. The Curate looked over the corpses and found a map that appears to show the level they are on.


Until next time...

Notes: On page 25 of B2, Gygax suggests including in the basement of the Guild House "a secret entrance to a long-forgotten dungeon (which, of course, you must design and stock with monsters and treasure)!". See also: Dragonsfoot Discussion of the Dungeon Under the Keep on the Borderlands

Friday, March 30, 2012

Storytelling with B2


A few nights ago my 4-year old son asked if we could finish reading the "castle book", by which he meant the module B2 Keep on the Borderlands. A week earlier, "The Warrior" had approached the gate, talked to the guards and the Corporal of the Watch, eaten fruit off the menu in the Tavern, met a Dwarf, stayed in a private room (his choice) at the Inn and bought equipment from the Provisioner. I used a few pictures from the module to help illustrate this, including the one above from the back of the module, and the two-part picture by DSL of the guard on the battlements hailing the mounted traveler on the drawbridge. He's been watching the 1967 Spiderman lately, so I thought he could handle the same level of danger/adventure.

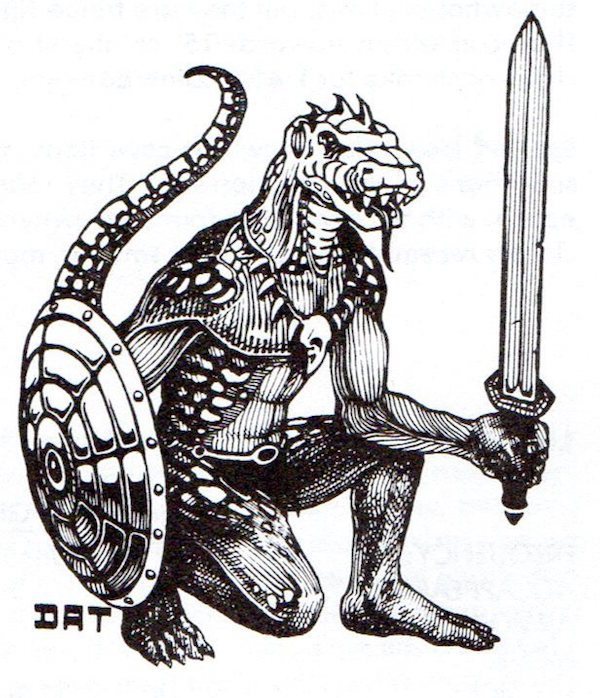
We started with a recap of the previous week's story. Now the Warrior had a meeting with the Castellan, who asked him to investigate the rumors of menacing caves in the woods, and gave him a potion of healing. He met the Dwarf by the fountain and they headed out. I showed him the Wilderness Map, pointing out the various features (road, river, hills, woods), and the numbers and the clearings that they would need to explore. He wanted to start with #1, so they headed south to the "stream" and wondered how to cross. After some discussion, they crossed near the islands where it turned out to be shallow and rocky. Heading into the swamp, they found a large dirt mound with a dark cave on the north side, around which were footprints in the mud with claws instead of toes. The Dwarf lit a torch, but didn't want to go in first. So the Warrior took out his sword and walked in a little way until he saw a pair of eyes and heard a voice growl, "Leave us alone". Of course, the Warrior didn't leave, so a Lizardman came forward out of the dark. I showed him the picture from the Monster Manual:


Many more eyes appeared behind him in the dark. The Warrior thought maybe he should "poke" the Lizardman with his sword, but the Dwarf suggested there were too many so they backed out of the cave. The Lizardman followed them and asked if they would be interested in a job getting rid of some spiders in the woods to the south, in exchange for a gold necklace. The Warrior agreed and they walked south into the tamarack stand. 

In the woods they eventually reached a clearing in the middle with lots of webs around. As Warrior walked into the clearing a large spider dropped on the Dwarf's shoulder and bit him! The Dwarf killed the spider but fell over, poisoned. Meanwhile two spiders came scurrying towards the Warrior. One sprung at him but he caught in the air with his sword. The other tried to bite his leg but he stomped on it and then stabbed it. The spiders dispatched, he checked on the Dwarf, who had a numb arm but was able to walk. They searched under the webs, where, among animal bones, they found the skeleton of an elf with an old shield. The Dwarf told the Warrior that an elf from the Keep once disappeared across the marshes. They put the skeleton in a sack to bring back to the Keep for burial.

At the edge of the woods they were met by a group of the Lizardmen, who gave them the necklace after verifying the spiders were dead. The Warrior and Dwarf then returned to the Keep and told the Castellan what they had found. The Castellan's Advisor was grateful to learn what had happened to his cousin, the elf who had perished, and let them keep the shield, which was magical, in return. And the Warrior wants to sell the necklace to buy some "fire fighter and police equipment". : )

Until next time...

Continued in: Storytelling With B2, Part II