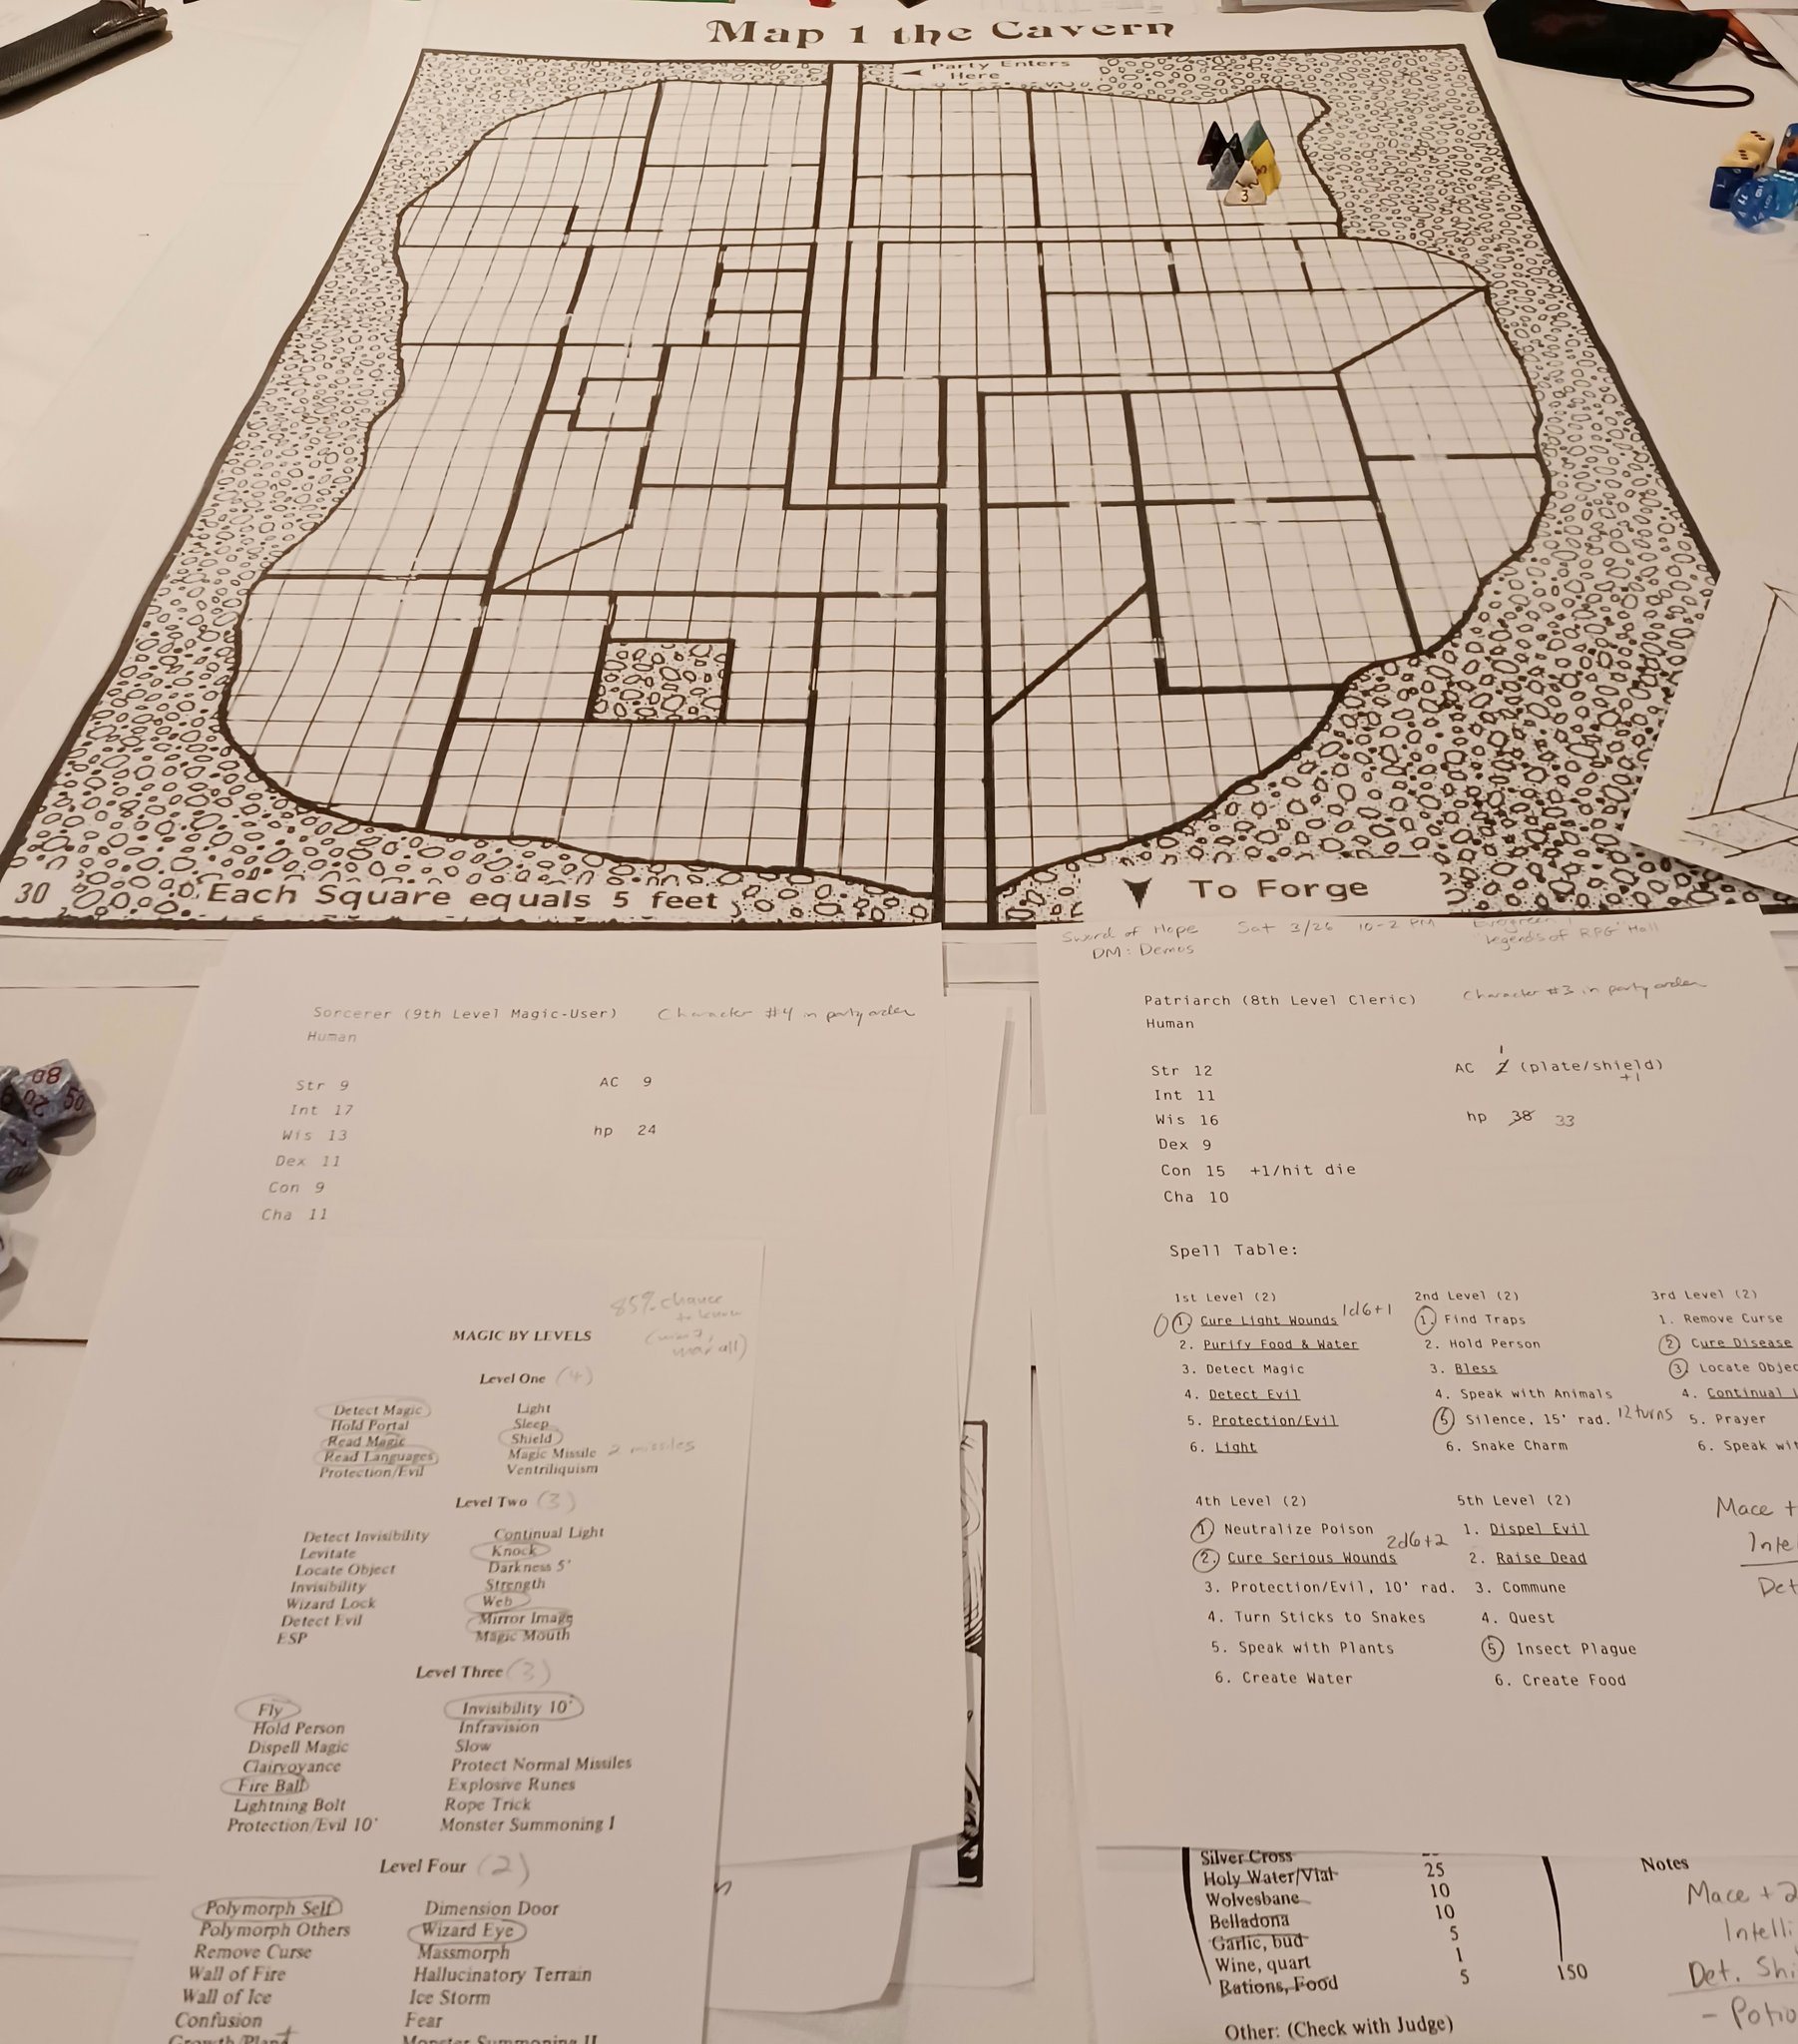
Each entry includes part of a "pointcrawl" map showing the area & any exits, which include links allowing you to navigate the dungeon:
| Area 17 === | 19. OPEN PIT |
=== Area 20 |
19. OPEN PIT. A 10-foot wide tunnel runs 70 feet east-west between Areas 18 and 20, but is interrupted by an open pit, 40 feet from Area 18 and 20 feet from Area 20. The pit fills the width of the tunnel and is 10 feet across. This was once a covered pit trap, but the cover long ago collapsed into the water. A thief could climb past using the wall on either side without much difficulty (+5% to Climb Walls).
The pit is 15 feet deep, but 5 feet of it is filled with water. If observed, two unusual things will be noted about the water:
| Area 19 === | 20. SUB-BASEMENT |
U== | Green Dragon |
20. SUB-BASEMENT. The center of this small room (20 feet north-south by 40 feet east-west) is dominated by the planks and beams of a collapsed wooden staircase, which once led up to a trap door in the ceiling, 20 feet above.
In the middle of the west wall is a doorway, holding the broken remains of a wooden door, leading to the tunnel to Area 19. If examined, it can be determined that the door was locked from inside the room and broken into from outside in the tunnel. The walls around the door are covered in old graffiti, mostly inscrutable to PCs, but giving the impression that it was made by smugglers decades ago.
Bones, decaying clothing and leather armor, and rusted weapons are strewn about the room. Around the collapsed stairs are scattered gold coins (33 gp total) and a valuable-looking green eye agate, worth 100 gp, which will be easily spotted by its glimmer in torch or lantern light.
Collapsed Stairs. Pulling aside the pieces of the stairs will free an agate-eyed skeleton trapped beneath the wreckage. The agate on the floor is its left eye, and if anyone has picked it up, the skeleton will immediately attack them in order to take it back. If the eye is still on the floor, or is given to the skeleton, it will take it and depart to the west.
Agate-Eyed Skeleton (DX 12, AC 7, HD 2, hp 9, AT 1 bony hands for 1d6, SD when at rest, gazing at eyes causes sleep (save versus magic); when animated, turned as a ghoul.
A full write-up of this new monster can be found here.
The right eye of the skeleton is also a green eye agate also worth 100 gp.
Also among the wreckage are the remains (bones, clothing, leather armor, rusted daggers) of three humans who, fleeing from skeletons, overloaded the stairs, crashed through, and perished when it collapsed on top of them. Among their bones are more gold coins (57 gp).
Ceiling Trap Door. The trap door in the ceiling is about 30 feet east of the door. The bottom side of the trap door contains scratch marks, as if made by someone or something once trapped at the top of the stairs.
The trap door is locked from the top side, but even if the lock is picked, the trap door will not open easily as a heavy wooden wine barrel on a wooden rack is resting on top of it. It takes a combined strength of 36 to lift the trap door enough to cause the barrel to roll off the rack, allowing the door to be opened further.
The Area Above. The trap door opens into the wine and beer cellar of the Green Dragon Inn, which fifty years ago was a hub of smuggler activity in Portown. This basement is stocked with an assortment of wine barrels and beer kegs. The current proprietor will come to investigate any loud noises made during opening the trap door or poking around the basement. No one who now works at the inn now remembers what is below the trap door.


